
The Holy Grail
Humanity’s quest for the perfect roast chicken
Roast chicken is a lightening rod for goofy recipe strategies.
It’s the quintessentially delicious food, after all, having an appeal that nothing else quite matches—sweet in savor and succulent in texture, easy enough to handle that it imposes no special burden for the cook.
The bird is a miracle, one we take for granted.
That’s until we decide to roast it, at which point we view a chicken as a structural-design catastrophe, all because the breast meat cooks a little more quickly than the legs, leaving one inevitably less exquisite than the other.
The breast question: To a foodie, it’s one of the great enigmas of humanity, right up there with cold fusion and time travel.
As Ponce de Léon once tirelessly sought the fountain of youth, so too have generations of recipe-writers pursued an equally fabulous prize: the perfectly roasted chicken, one in which the breast meat finishes at precisely the same moment as the legs.
They’ve tackled the problem from every angle. They’ve roasted it sideways, and upside down, and backwards. They’ve suspended it over metal racks. They’ve covered the breast with strips of bacon and sheets of aluminum foil. They’ve pried the skin loose in order to massage the flesh with butter. They’ve flattened the carcass with blunt objects.
And none of it really makes a difference. I know because I’ve tried them all.
The problem with a roast chicken isn’t any disparity between breast and leg meat, it’s one of perspective.
A roast chicken is supposed to be imperfect. That’s the trade-off for deliciously concentrated flavors and a tasty, browned exterior.
Learning to regard something by its own objectives like this is what enables you to embrace compromise as a way to achieve what you really want. That’s how you cook without recipes.
Learning to regard something by its own objectives—that’s how you cook without recipes.
As it happens, each portion of the chicken can be equally delicious (if not equally tender), as long as the bird is cooked properly as a whole.
To do that, all you need is a simple rule of thumb: A three-pound chicken is done in forty-five minutes.
I’ll explain.
Chicken breasts possess less fat and connective tissue than chicken legs. The former is less succulent and gives a cook less leeway, it’s true. But the difference is only slight. It isn’t like having a fish fillet strapped to a chuck steak.
If you were to roast a chicken with a mind towards having one part meet your ideal, then the other part of it would fall only slightly short of that ideal.
Pseudo-scientific tweaks have only trivial effects, in other words. No hassle is worth the effort.
Flipping a chicken upside down halfway through roasting, for example, turns the breast away from the radiant heat of the oven’s ceiling only to expose it to the searing heat of the roasting pan.
Cutting out the backbone in order to flatten the carcass (“spatchcocking” it, to use a foodie term seemingly borrowed from the pornography industry) is eqully ineffectual. A chicken breast cooks quickly because of its composition, not its position. The result looks like roadkill, in any case.
Covering the chicken in aluminum foil just prevents the breast from browning nicely.
“Brining” the bird in saltwater—now this actually achieves something.
Salt transforms meat fibers in a way that enables them to capture and retain moisture.
Going so far as to immerse the bird in a salt bath, however, has an unfortunate side-effect in that it causes the chicken to absorb the water itself, which dilutes the meat’s own savory juices.
Just douse the bird in table salt. Do it right before you put the chicken into the oven; high heat rapidly accelerates the salt’s dissolution.
In general, the more effort that you spend on tips ’n tricks to safeguard the breast, the less likely it is that you’ll pay attention to the only thing that really matters, which is the moment that you should remove the chicken from the oven.
To determine that, all you need is the forty-five-minute time frame that I gave above. Like any rule of thumb, it requires a little adjustment, although learning whether to add or subtract a few minutes is an easy and enjoyable process of discovery.
All you need to roast a chicken is a simple rule of thumb: A three-pound bird is done in forty-five minutes.
Just leave your instant-read thermometer in the drawer.
A chicken hasn’t finished roasting when the breast registers at 155°F (68°C), a threshold that recipe-writers issue with tones of alarm as if they were talking about the Space Shuttle overshooting its re-entry window and vaporizing somewhere over the Azores. A chicken has finished roasting when you are satisfied with the results.
Merely reaching the point at which the meat is safe to eat, which is what you do when you cook it to precisely 155°, yields a result that not everyone finds appealing. The color of the legs will be a sanguine shade of pink that alarms some people, and the texture will be sinewy, especially in genuinely free-range chickens.
I myself don’t mind sinewy texture. I consider it to be an acceptable trade-off for very tender breast meat. My mom, on the other hand, considers sinewy legs to be “raw,” and she’s more or less indifferent to the tenderness of the breast.
The perfect roast chicken is therefore a matter of instinct.
And instinct is had by focusing on one or two variables and relying on what you can see (and taste) for yourself.
Having realized that myself at some point, I decided to simply settle on one oven temperature, then pay attention to the weight of the bird and the time that it took to roast. Eventually, I found a result I liked. No disaster occurred in the process.
Nowadays, when I roast a chicken, I know that a three-pound bird is done in forty-five minutes, a four-pound bird in just under an hour, and that all the other chickens fall within or just beyond that spectrum. I glance at the weight of the bird, set my kitchen timer, and go do something else.
I add five minutes if I’m cooking for Mom.
•
How to Roast a Chicken
If you do nothing else but shove the bird into your oven and remove it at the appointed time, then it will be fine. The result will be adequately delicious and your meal will be a success.
Two improvements have a noticeable effect, nonetheless: One is to truss the bird, which is quick and easy. The other is to salt the bird, which is practically effortless. I’ll explain each in turn.
The twine for trussing is on my list of basic tools, and salt is in my basic inventory.
Let’s go.
- Buy the right kind of chicken.
Before I tell you how to roast a chicken, I need to tell you how to buy one.
More so than any other chicken preparation, roasting is compromised by run-of-the-mill supermarket fair.
To achieve a nicely browned, fully flavored roast chicken, look for the words “air-chilled,” meaning that the carcass was suspended from a conveyor belt circulating through a dry, refrigerated room.
Otherwise, the chicken will have been chilled in a chlorinated bath, which leaves the meat water-logged. The result for you would be a pale roast and a puddle of insipid broth in your roasting pan.
(What about free range? all natural? kosher? I explain all of that in my article on chicken labels.)
- Determine how long the chicken needs to roast.
Glance at the weight of the chicken.
Do that before you throw away the packaging.
The bird’s weight is one of only two variables you really need to worry about, the other being the duration of the roast (which I’ll address momentarily).
- Prepare your oven.
Position a rack in your oven’s lower third.
That’s easiest to do when the oven is still cold.
As I explain in my article on oven temperatures, oven walls radiate heat like any other hot metal surface. Since radiated heat fades by the inch, it’s worthwhile to put some distance between the breast of the chicken and your oven’s ceiling.
Turn your oven dial to maximum, then back it off a quarter turn. Alternatively, set it to 450°F (230°C).
That’s what I call high heat. Find out more about it in my article, once again, on oven temperatures.
Hot temperatures kick-start a chemical chain of events called the Maillard (ma-yahr) reaction, in which sugars and amino acids undergo a series of changes that result in tasty, browned surfaces.
Chickens cook so quickly that, were it not for this jumpstart, the meat would become unpalatably dry in the time that the skin would take to brown.
Set a timer for forty-five minutes.
That’s the time it takes for your oven to heat adequately.
Pre-heating an oven is like charging a battery. The goal is to allow enough time for the interior walls of the appliance to achieve the same temperature that you want the air to be. Hot air is what actually cooks your food. Until the walls are hot, they just absorb heat from the air itself.
Ovens are temperamental appliances. Their thermostats are notoriously out of whack, and their quality varies from one model to another. You can use an oven thermometer to get a general idea of the temperature you receive when you turn your dial to a particular setting (which is how I determined that my own oven dial is twenty degrees off), but those gadgets are also temperamental, and conditions inside of your oven constantly fluctuate, anyway.
The purpose of this guide is to show you exactly what to expect when roasting a chicken so that you can manage the process with or without gauges and dials. After this, you’ll be able to roast a chicken on a spit over a campfire, using nothing but your wits.
Use the convection setting, if you have one.
The convection setting helps your oven to mimic the effects of roasting in the open air. It engages a fan in the back of the oven, circulating air constantly in order to wick away the vapor that foods release as they cook. Such moisture has a tendency to hover over foods like a blanket of fog, insulating them from the oven’s full heat.
(A convection fan doesn’t make an oven hotter, as is often said, it just makes the heat of an oven more effective.)
- Prepare the chicken.
Give the chicken a whiff.
This is the necessary first step in cooking any poultry. The chicken should have no odor whatsoever. That’s the ideal, at least. If you detect even a trace of something like sulfur, bite the bullet and throw the chicken out.
If the chicken is damp, pat it dry with a few paper towels.
Maillard occurs only at temperatures above the boiling point of water (212°F/100°C), which means that surface moisture must evaporate before browning can even begin.
So, dry your ingredients if they are damp, otherwise, they’ll overcook in the time that it takes them to toast.
Pull this out:
That plug of fat serves no purpose, and it interferes when you go to put something else in the chicken’s abdominal cavity, such as herbs or garlic.
Tuck these back:
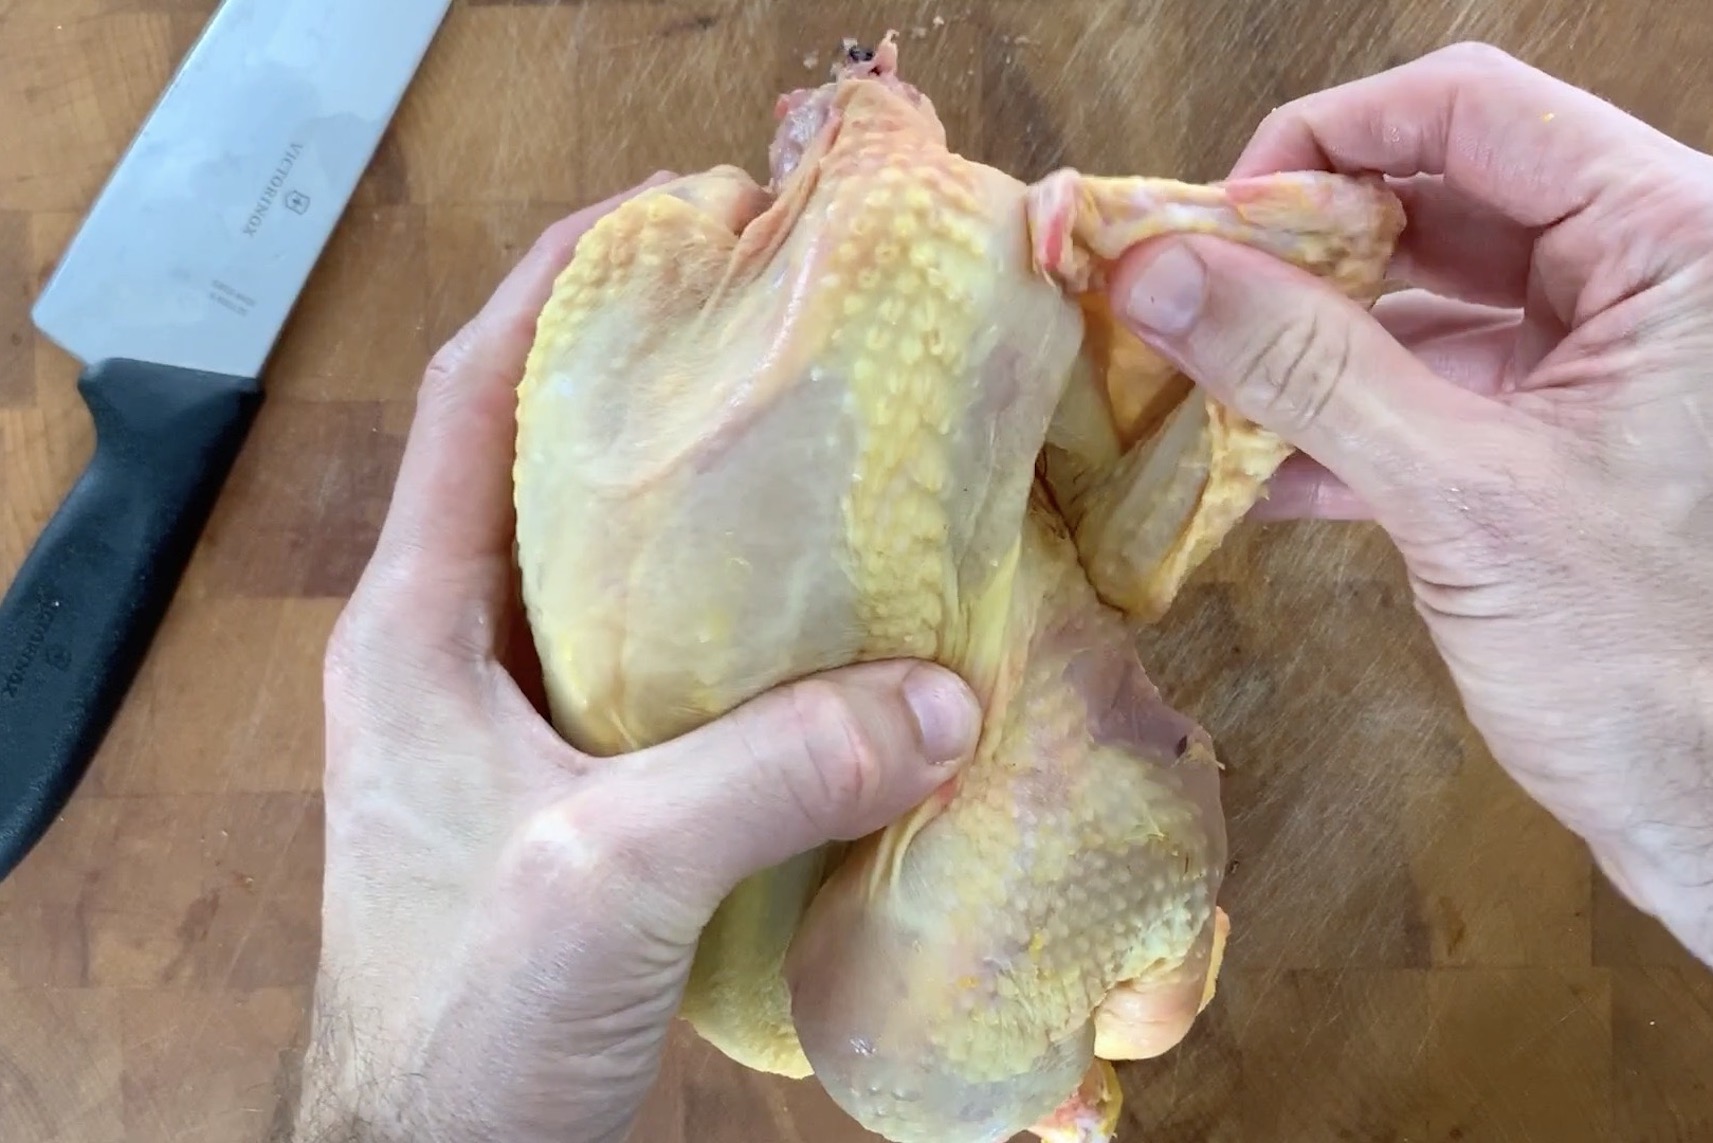
Tucking the wings back makes for a nicer-looking roast. They’ll also stay out of the way as you carve the bird.
Cut this off:
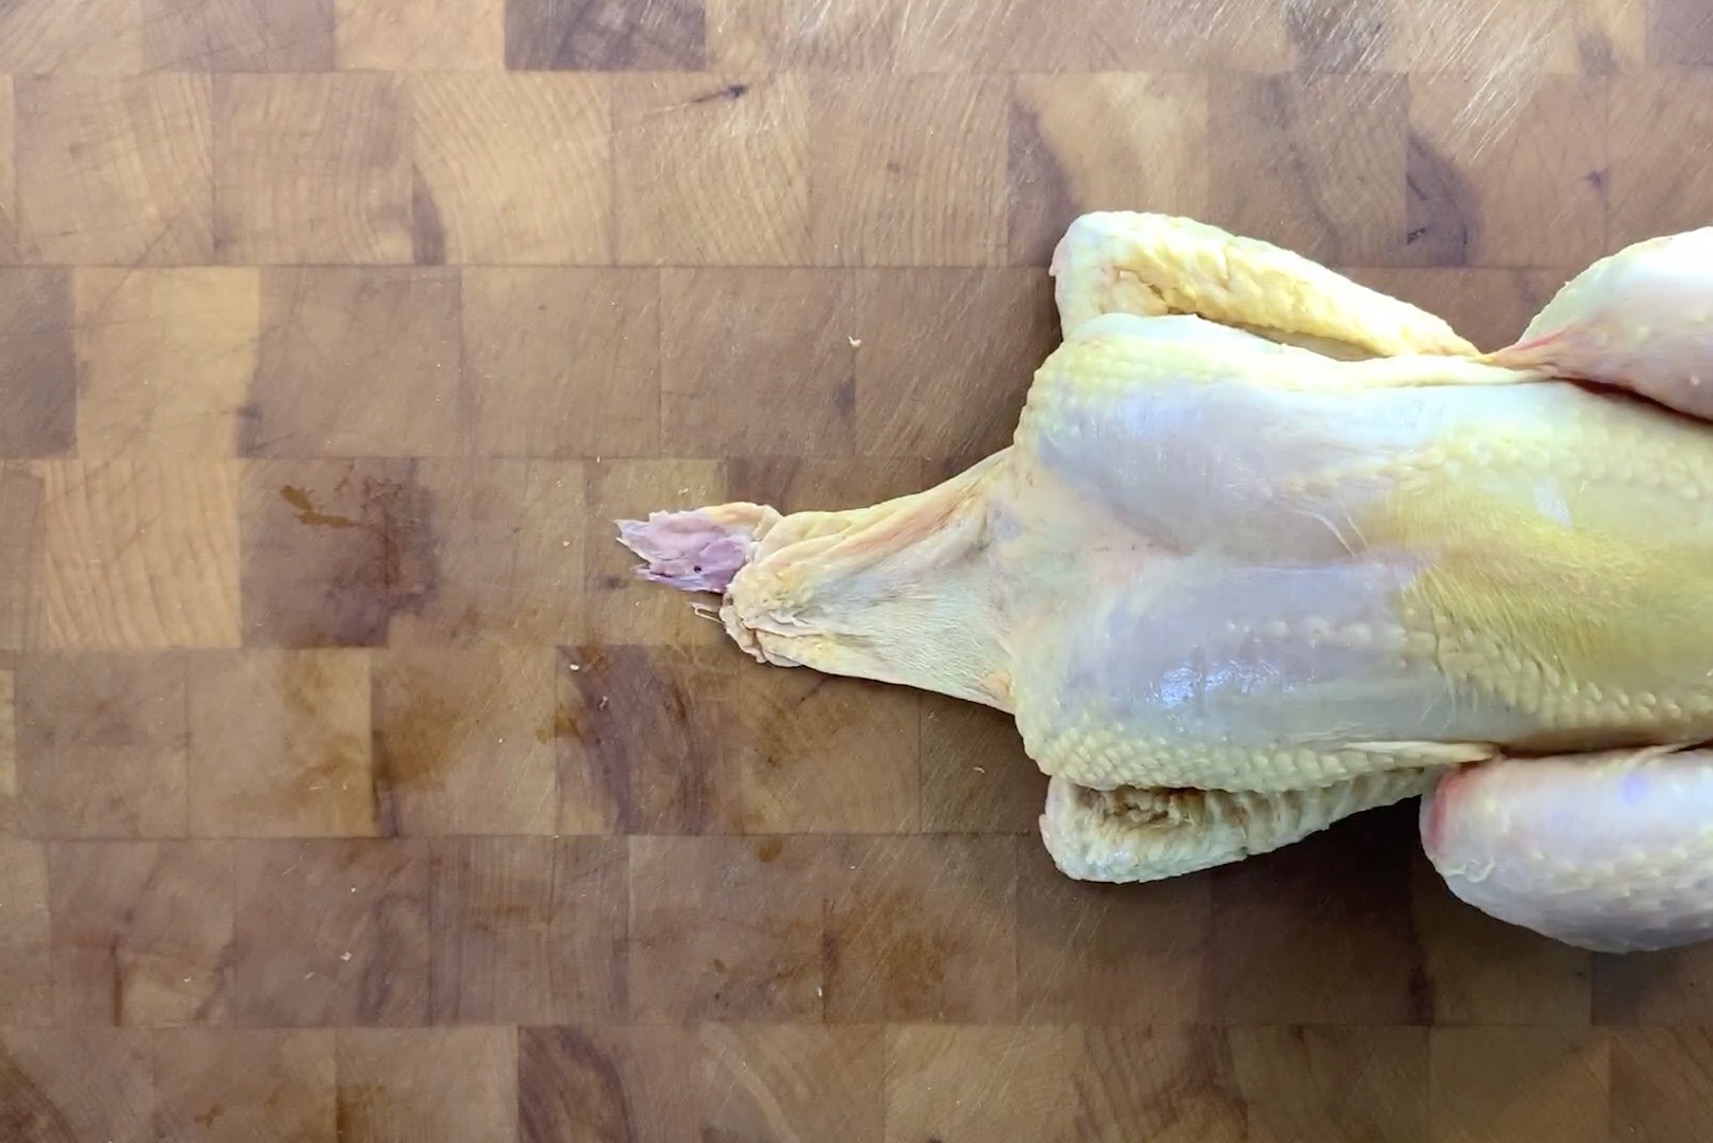
That extra skin tends to flap around and get in the way.
You need only enough of that skin to cover the small cavity at the top of the bird. Covering that gap preserves the chicken’s interior from the full heat of the oven, which helps to keep the breast meat tender.
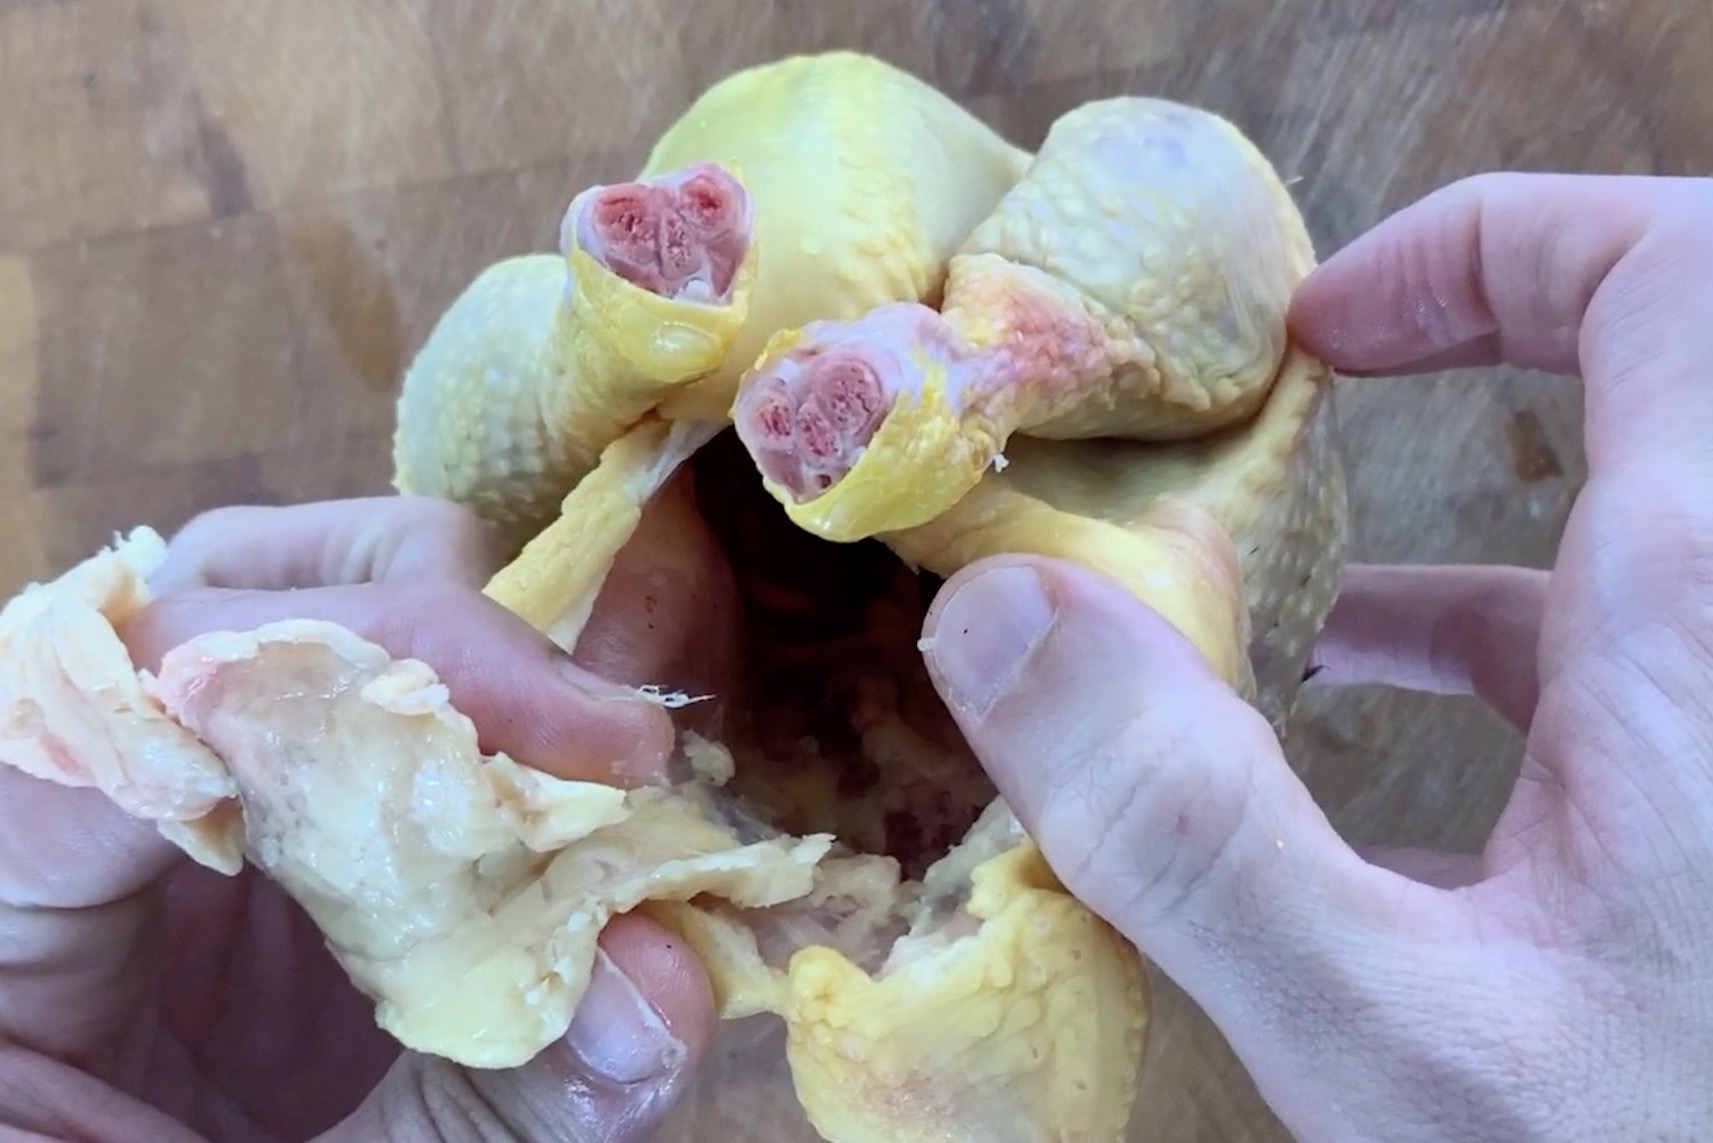
- Remove the wishbone.
This step, purely optional, makes carving the bird much easier since the wishbone interferes with your knife as you slice off the breast meat.
Without the wishbone, you can make a clean stroke straight down through the wing joint.
Here’s how:
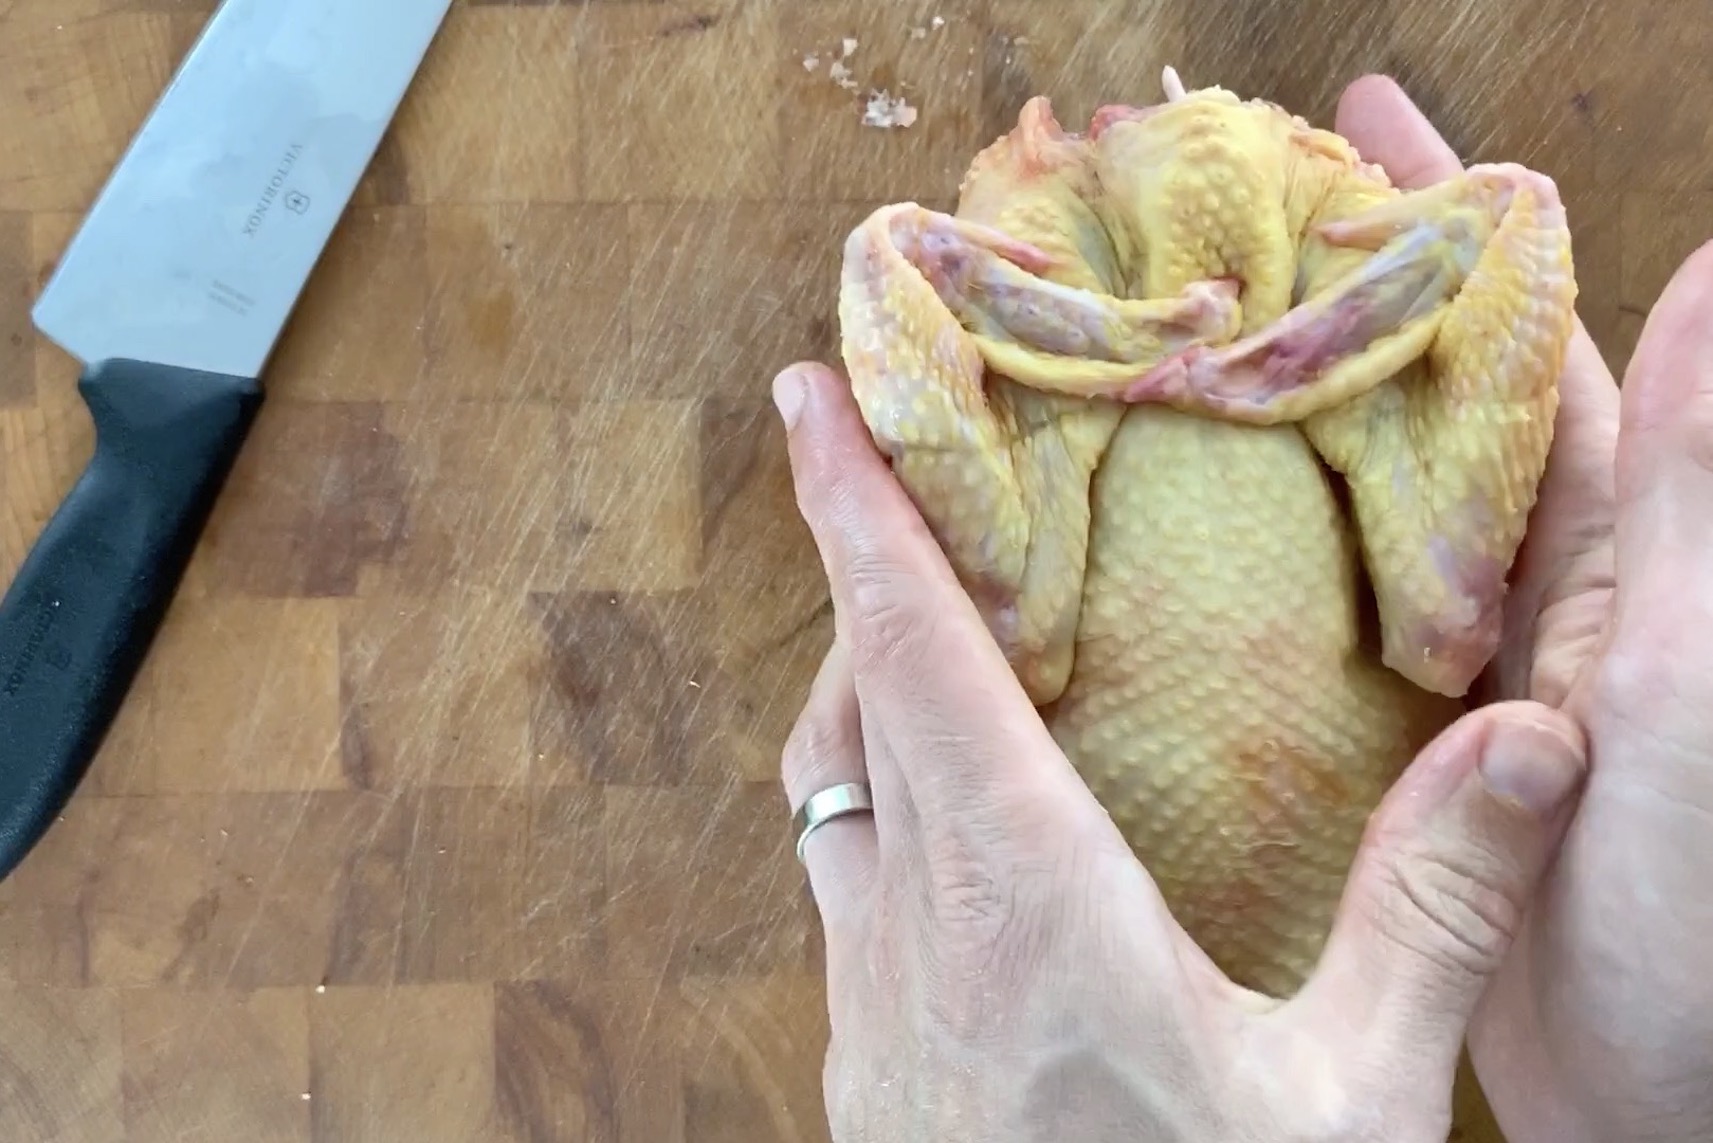
- Truss the chicken.
Trussing a chicken is controversial, because it’s an extra step and because most people never bother to check whether it makes a difference.
It does. The breast meat of a trussed chicken is noticeably more succulent, because the breast is heaved into a plump shape that cooks evenly, and because its slender tip is shielded by the legs, which are drawn together. The legs also close up the chicken’s abdominal cavity, cutting off the underside of the breast from the oven’s hot air.
The legs themselves seem to cook more evenly, as well, probably because the joints are pried open a bit, which allows heat to more easily penetrate this notoriously resilient spot.
In home cooking, results must always justify efforts. Trussing is a quick and simple task, once you know the quick and simple method.
To do it, you’ll need about one yard (1 m) of something like butcher’s twine. I’ve even used dental floss (although the thin, ribbon type tends to snap half-way through cooking).
Here’s how:
- Put the chicken into a roasting vessel.
Use a receptacle that heats evenly and is just large enough to accommodate the chicken.
Flimsy materials over-heat in places, causing the chicken or its drippings to scorch. That’s why recipe writers frequently call for cast-iron skillets.
Any kind of heavy pan material works fine, in fact. (Lately, I’ve been using a ceramic baking dish.)
As for the size of the vessel that you use, the same principle for sautéing applies: The chicken should fit snuggly, otherwise large gaps in surface area will overheat and cause drippings to burn.
Place the chicken breast-side-up, by the way. Its arching sternum is what makes for a nice-looking roast, not its unflattering arse. (You’d just have to flip it over, anyway, to carve it.)
- Salt the chicken.
Sprinkle salt over the entire surface of the chicken.

Without a doubt, the tenderest and moistest chicken meat is had by “brining” the bird for several hours in a saline solution.
Two problems accompany that method, however: The first is that the meat absorbs some of the brine itself, which dilutes the chicken’s flavor.
The second is that the salt of the brine so completely dissolves throughout the chicken’s flesh that its meat fibers re-bond into a kind of polymer. Plasticization is the actual term for this. The result resembles processed lunchmeat.
Nowadays even recipe-writers seem to recognize these drawbacks, as brining appears to have fallen somewhat out of favor among the foodie cognoscenti.
Just salt the chicken right before you put it into the oven. High temperatures compel salt to dissolve and disperse rather quickly.
In the time that it takes the chicken to roast, the salt will have seasoned the outer thirty percent of the meat, which is the most vulnerable portion, anyway. Texture will be improved, flavor retained.
(Kosher chickens are salted already, by the way.)
- Clean up.
Anything that touched the chicken goes into the dishwasher or the trash.
Anything to be washed by hand should be done neatly. Try to avoid splashing everywhere.
Wipe up afterwards with bleach wipes.
Meat is now sadly a potential vector of disease in our age of factory farming. I have more to say about that in my article on chicken labels.
- Put the chicken into the oven.
Place the pan in the center of the oven with the breast facing outwards.
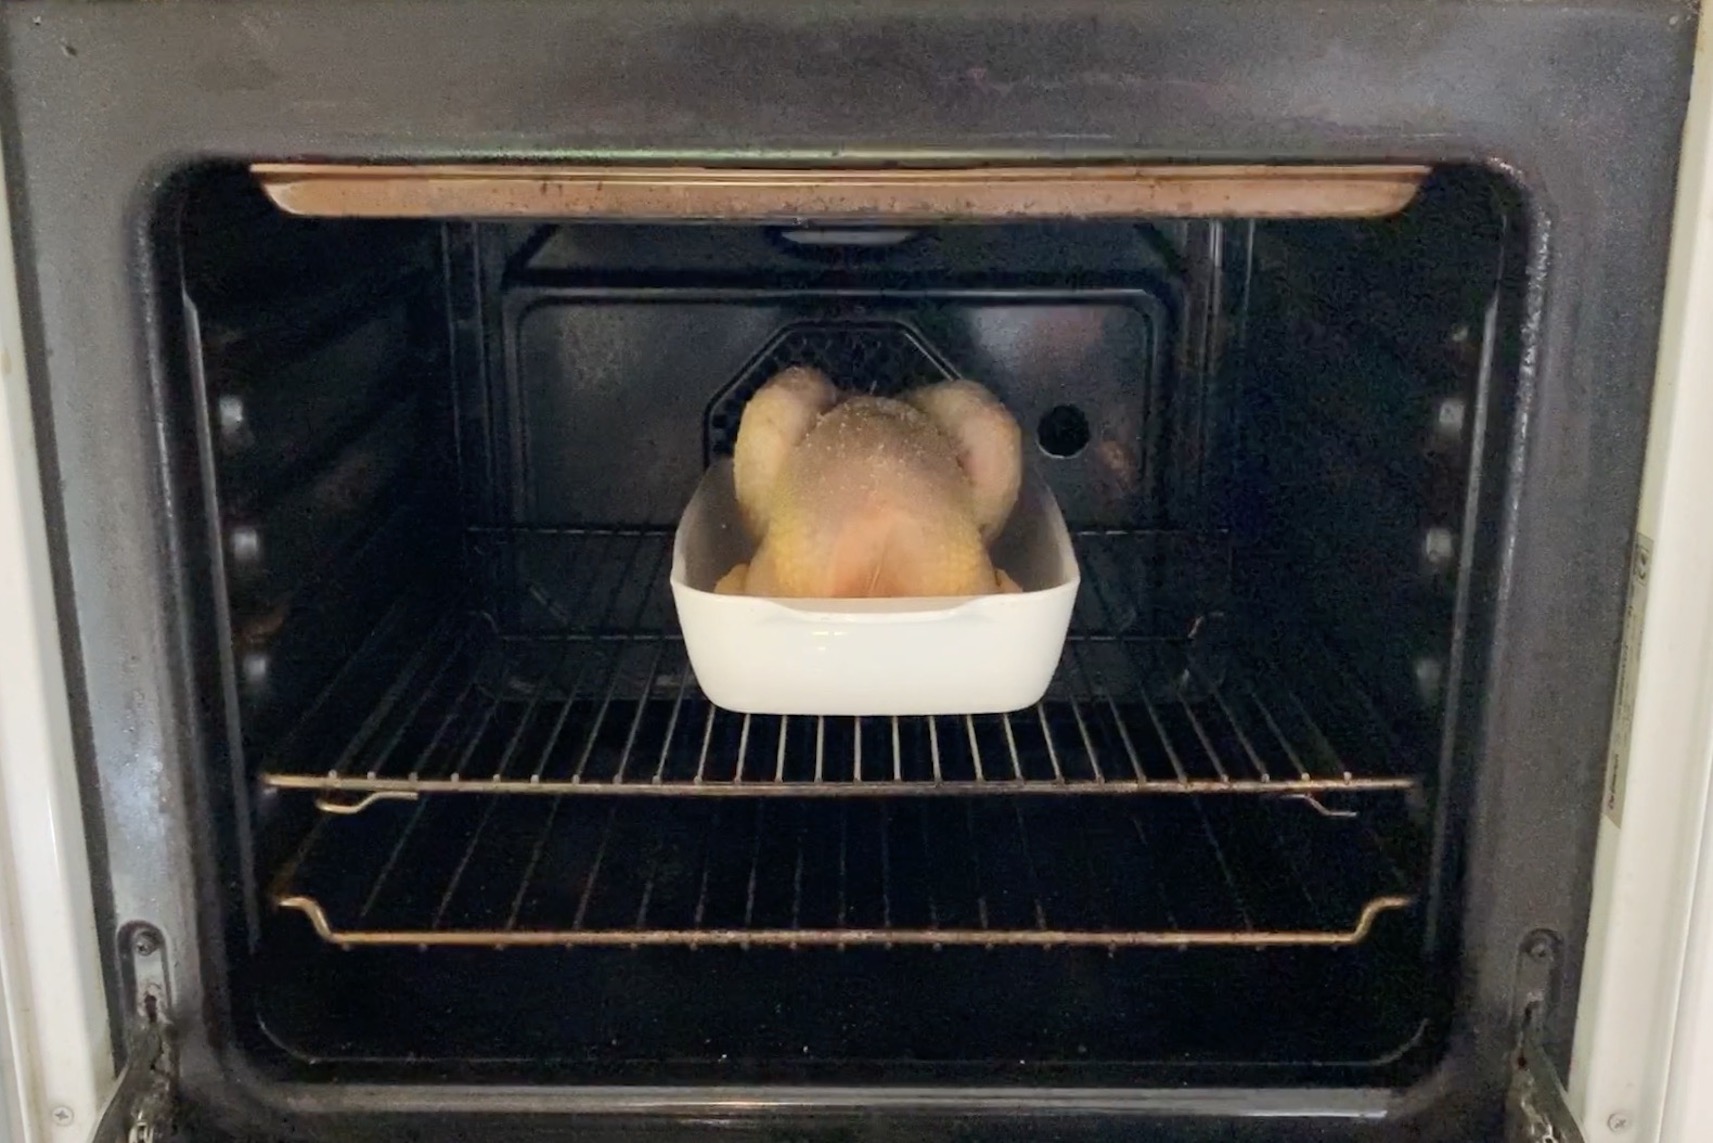
Orienting the breast towards the oven door takes advantage of the fact that the glass of that door radiates much less heat than the steel walls behind it.
Putting the chicken on a rack positioned in the oven’s lower third (which you did in Step 2) distances the breast from the radiating heat of the oven’s ceiling.
And placing the bird in the center of the oven’s chamber ensures that one side of the bird doesn’t roast more quickly than the other.
(To roast two chickens side-by-side, trade their places halfway-through.)
- Roast the chicken until it’s done.
A three-pound chicken roasts in about forty-five minutes, a four-pound bird in just under an hour, and every other chicken falls within or just outside of that spectrum.
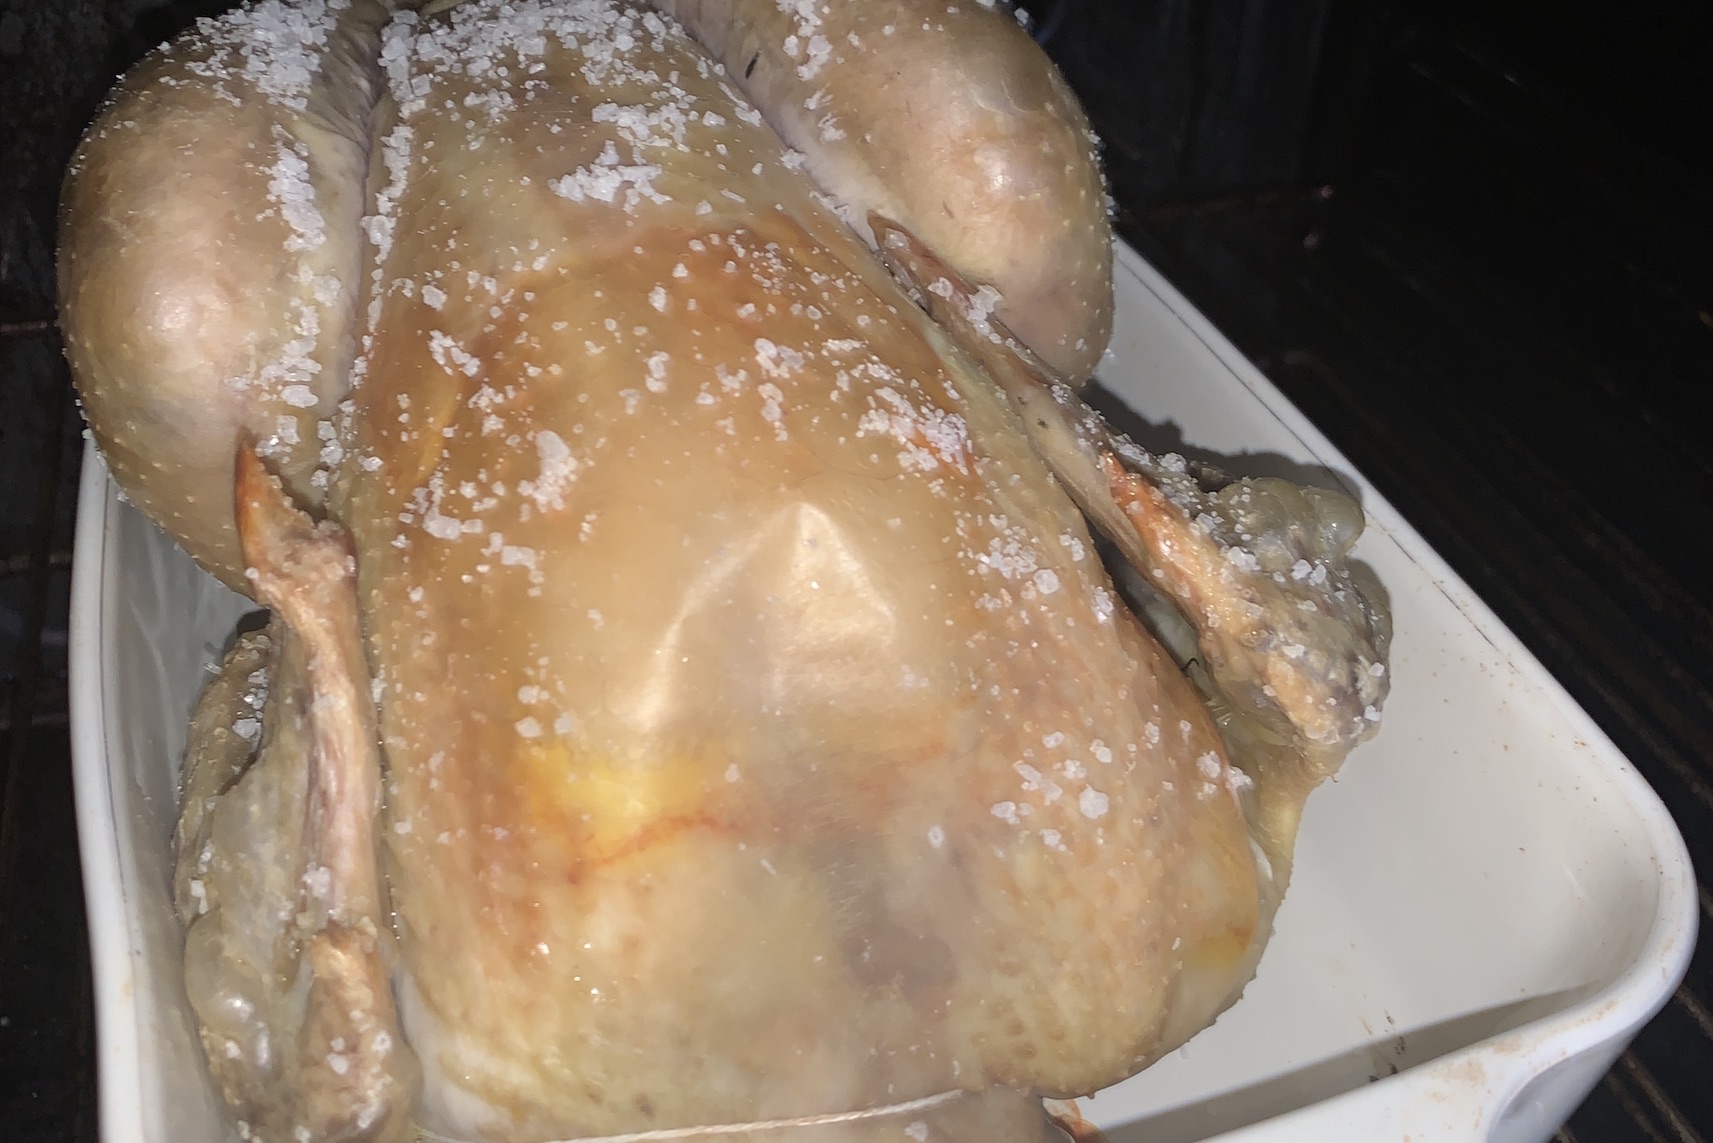
Anything that you expose to high heat will begin to brown in about twenty minutes. That’s how you verify whether the heat you happen to be using delivers the heat that you require, whether you’re roasting inside of an oven or over a campfire.
After twenty minutes, a chicken should look like this:
When it has finished, it should look like this:
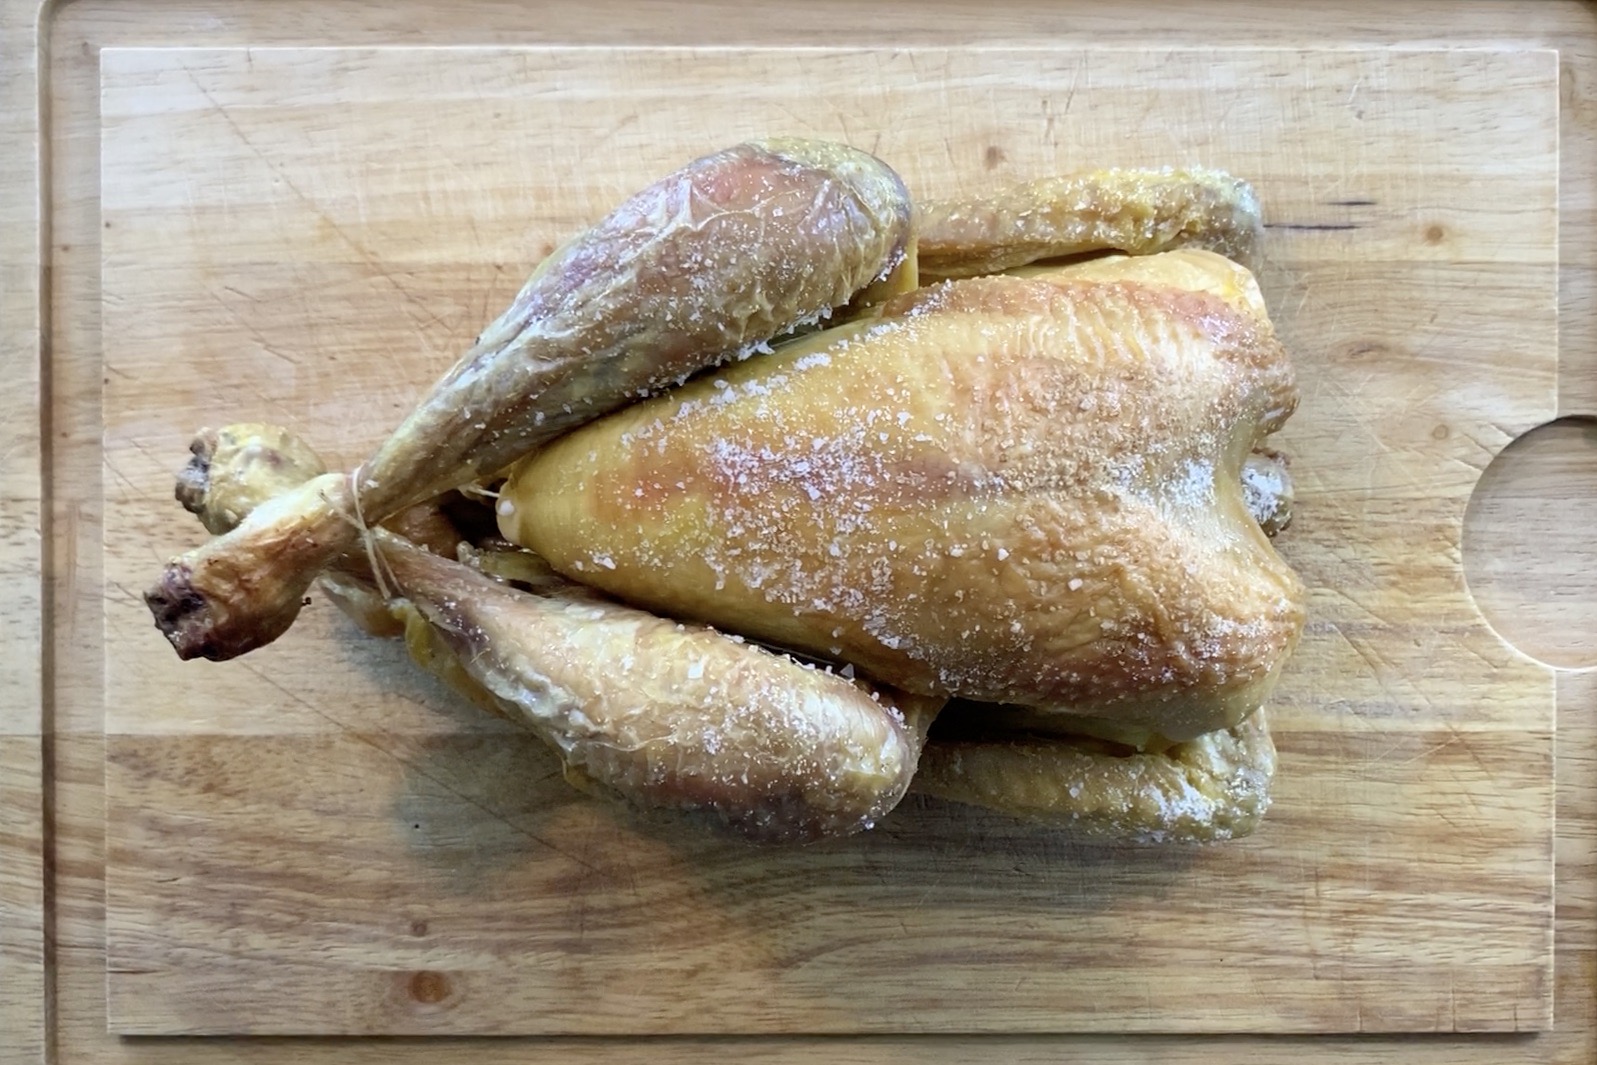
Keep in mind that a chicken is an unrefined product with naturally occurring variations in color, taste and texture, as they say in the food industry. Be patient, and experience will guide you.
- Leave the chicken to rest.
Remove the roasted chicken to a cutting board, then permit it to sit for at least twenty minutes.
A meat fiber is basically hollow tube, filled with liquid.
High temperatures cause the ends of this tube to pinch shut, driving all of its liquid towards the center. Slicing through the fiber at this point just causes the liquid to squirt out; it would be like uncapping a tube of toothpaste while standing on the other end.
Wait instead for the meat to shed a little heat. Its fibers will relax, their juices redistributing themselves into a state of equilibrium once more. This liquid will stay put, rather than spill out onto your cutting board.
While the meat rests is the ideal time to start your meal, by the way. Roasting requires a considerable amount of time, after all, in spite of its convenience; it’s the perfect method for a weeknight as long as you can manage your time effectively.
At my table, it’s the perfect opportunity to focus on something like a salad, which puts vegetables in front of my five-year-old’s face at a point when he’s still starving. Afterwards, I bring out the roast and carve it right there on the spot, while the boy makes noises like a bloodthirsty savage, pradoxically naming all of the parts he refuses to eat.
In any case, planning to eat at the earliest possible moment enables you to handle practically any delay. If you receive an important phone call ten minutes before the roast is done, no sweat, dinner can wait.
- Carve the chicken at the table.
We roast meat partly to have a grand meal centerpiece. Meal-making is much more than the taste of the food in your mouth. It’s a ritual of conviviality, a celebration of shared experience, of warming sights, and savory aromas, and symbols of hospitality.
No one has turkey burgers for Thanksgiving, after all, even though they would be easier to prepare and probably more delicious.
Carving isn’t difficult. You shouldn’t be afraid to do it in front of people. You can use the same disposable knife that I recommend for everything else.
You’ll want to practice a few times before having the boss over for supper, of course.
And that’s it.
 |
SHARE THIS ARTICLE